Blocks
Blocks are Flowchart atomic primitives. They are used for sending packets into a network, receiving packets from a network, analyzing and modifying packets data, controlling timers, calling external scripts, etc.
An instance control flow enters a Block at an Entry Point, and exits via an Exit Point.
Blocks have the capability to read/write data from/to variables. Data could be shared with other instances via global variables. Blocks can use services of the host OS, including file system read/write, database API calls, etc.
Block Types
There are 14 types of Blocks. Any Flowchart can be built with blocks 1-9 only. Blocks 10-14 make building and reading Flowcharts easier.
| Type | Icon | Does what? | |
|---|---|---|---|
| 1. | State |  |
Enters or Exits a State. |
| 2. | Trigger |  |
Spawns a new instance. Also is used to delay execution without Timeouts. |
| 3. | Receive |  |
Waits for an incoming packets. Receives a packet. Saves the data into variables. |
| 4. | Send | 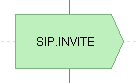 |
Modifies some packet fields from variables and sends out the packet. |
| 5. | Operations | 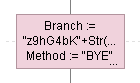 |
Processes data. Modifies variables. Calls APIs and external scripts. |
| 6. | Decision | 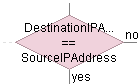 |
Transitions conditionally |
| 7. | Start Timer |  |
Starts the countdown and blocks the associated Timeout gates. |
| 8. | Stop Timer | 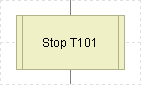 |
Stops the countdown, unblocks the the associated Timeout gates. |
| 9. | Timeout | 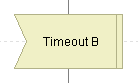 |
Blocks the path and waits for the associated timer counter go to 0. Also is used to launch new instances. |
| 10. | Reference |  |
Links Flowchart segments. |
| 11. | Option | 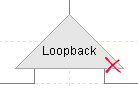 |
Transitions unconditionally. |
| 12. | Procedure Start | 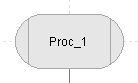 |
Enters a procedure. |
| 13. | Procedure Stop |  |
Exits a procedure. |
| 14. | Comments |  |
Comments, Notes. Non-executable. |
Context Menu
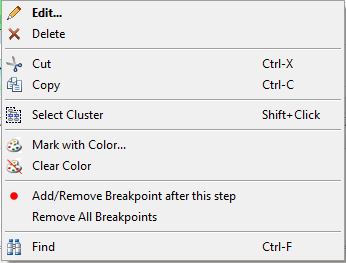
Blocks’ Context Menu commands:
| Commands | What Happens? |
|---|---|
| Edit | Open the setup dialog |
| Delete | Delete Block |
| Cut | Cut and place into exchange buffer |
| Select Cluster | Select all Blocks connected to this one |
| Mark with Color | Add color to Block background |
| Clear Color | Clear color from Block background |
| Add/Remove Breakpoint | Insert/Delete a breakpoint after a Block |
| Remove All Breakpoints | Clear all breakpoints |
| Find | Open text search dialog |
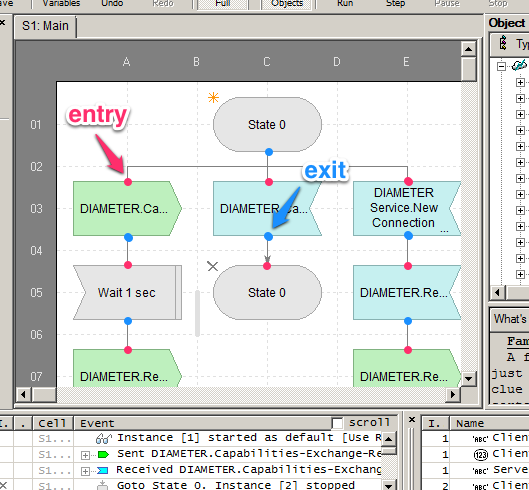
State Block
State Block marks control flow entry (with EnterState Block) or exit (with ExitState Block) points for a logical state (State) of a Flowchart. A State may have multiple EnterState Blocks and ExitState Blocks associated with it.
Every State Block has a State associated with it. All States of a Flowchart are listed in a global table.
The difference between a State and a State Block: The latter marks an entry or exit point of the former.
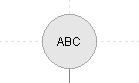
During execution, an instance is in ABC State from the moment it reaches EnterState Block named ABC, and until it starts executing a child Block of the ExitState Block with the same name. In all other times the instance is transitioning between states.
Block Types
State Block ABC is an entry or exit from a State ABC. State Blocks with the same name refer to the same State. Multiple State Blocks can be associated with the same State.
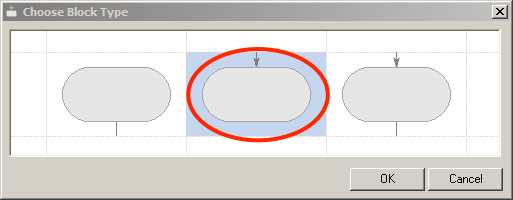
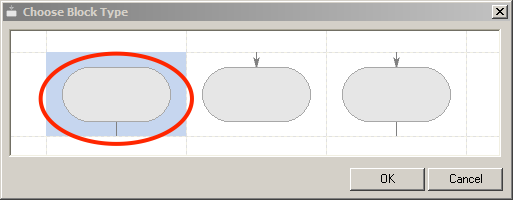
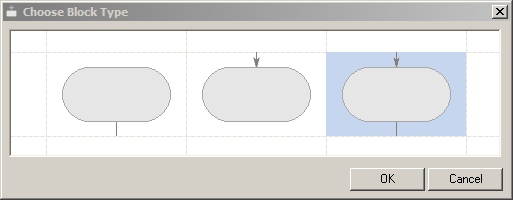
Types of State Blocks:
- EnterState Block
- ExitState Block
- PassThroughtState (PTS) Block
The type is selected during creation and could be changed later.
EnterState Block
EnterState Block has only an ingress point. When an instance enters a NORMAL State ABC via EnterState Block, it enters state ABC. When an instance enters a NULL State, it dies.
ExitState Block
ExitState Block has only an egress point. When an instance reaches a certain State, it can transition out of it through any of ExitState Blocks associated with the State. When an instance start executing one of the children of an ExitState Block, it moves into “in transition” condition (i.e. belongs to no state), and remains there until it executes an EnterState Block. In most practical cases ExitState Block has a complementary EnterState Block under the same name. The elements of the pair could be located on different worksheets.
For each state of a Flowchart, multiple ExitState Blocks are allowed. All these Blocks represent the same logical point in the Flowchart.
State XYZ
An instance enters state XYZ and stays there by reaching an ExitState Block for state XYZ and been unable to proceed further immediately because non of the child Blocks is ready to be executed. During that time period the instance is considered to be in the state XYZ. If at least one of the child Blocks is ready to be executed immediately, the instance simply pass through XYZ State with zero delay.
When an instance starts executing one of the child of an ExitState Block, it moves to “in transition” condition, and remains there until it executes another EnterState Block. Once can say the instance is transitioning between states until it reaches another State Block.
PTS Block
PTS Block (PassThroughState) has been added for user convenience. In some cases it allows to make the Flowchart more readable. PTS Block has both ingress and egress points and is a functional combination of EnterState Blocks and ExitState Blocks. This Block may be used to make a Flowchart easier to read and understand.
Instances never remain in pass-through States.
NULL State Block
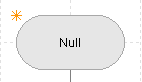
NULL State Block is a special Block executed at the start and end of every instance. They are “entry and exit doors” of NULL State.
Next Block To Execute
There might be multiple paths for an instance to exit a State. See more at Execution Order.
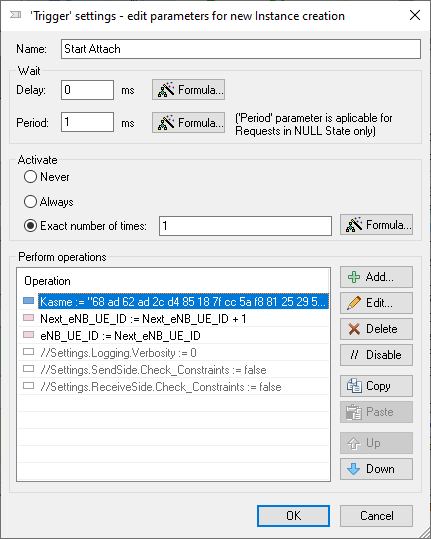
Trigger Block
A Trigger Block behaves differently depending on its relative position in a Flowchart.
- A Trigger Block is a child of NULL State Block. In this position it can be used for periodic creation of new working instances.
- In all other positions on the Flowchart a Trigger Block operates as a timer controlled gate.
Child of NULL Block
A Trigger Block directly descending from a NULL State Block can be used to periodically create a new instance. See more in instances…
Properties
Delay – Initial delay before the first instance is spawned.
Period – Defines a period between consecutive instances being spawned. A global variable name can be entered in this field. This allows to dynamically control the rate of new instances creation, as the value of the variable can be updated during instance execution.
Activate:
- Never – The Block is disabled. It is useful for temporary disabling the Block during development and debugging. A small red “disabled” sign marks the disabled Trigger Block on the Flowchart.
- Always – The Block will activate an unlimited number of times, until the execution is stopped. Each activation creates a new instance.
- Exact number of times – The Block will activate that many times. Each activation creates a new instance. The integer value determines the number of instances to be created. A global variable name can be entered in this field. That way the number of the Block executions could be controlled dynamically.
Perform Operations – Action List. The operations are executed in the context of the newly created instance: at the start of a new instance all local variables are at their initial values. The permitted operations are the same as for Operations Block.
Execution Context
The operations of Trigger Block directly descending from NULL State Block are executed in the context of the newly created instance!
Not a child of NULL
Trigger Block not directly descending from a NULL State Block just delays the instance execution.
Properties
The dialog has the following parameters:
Delay – Time delay before the gate is opened and the instance is allowed to pass through.
Period – Not used
Activate:
- Never – The Block is disabled. It is useful for temporary disabling the Block during development and debugging. A small red “disabled” sign marks the disabled Trigger Block on the Flowchart.
- Always – The Block will activate an unlimited number of times, until the execution is stopped.
- Exact number of times – The Block will activate that many times. A global variable name can be entered in this field. That way the number of the Block executions could be controlled dynamically.
Perform Operations – Action List. Actions are performed in the context of the current instance. The permitted operations are the same as for Operations Block.
One way to implement “waiting for a packet with a timeout” is to use the Flowchart fragment above. The instance waits for a packet to be received by the Receive Block, but not longer than the Trigger Block Delay field value.
Receive Block
A Receive block is used to filter incoming packets, route them to instances and save the incoming packets’ data in variables for further use.
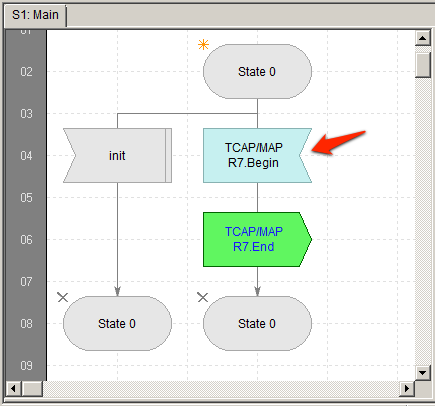
A Receive Block directly descending from a NULL State Block has a very important additional functionality — it triggers a new instance creation.
An instance executing a Receive Block goes into a blocking wait for incoming PDU. It remains blocked until one of the following events happens:
- It receives a PDU it was waiting for.
- An alternative execution path becomes available due to a timeout expiration.
In order to make a decision whether or not to receive an incoming PDU, a Receive Block can analyze any data field or fields of the packet. In case of the positive decision, Receive Block can save any data from the received PDU for future use.
Packets Routing
How does FlowCoder route PDUs to waiting instances?
When a packet arrives to FlowCoder engine, it is pre-parsed and broken into PDUs. Packets with PDUs no instance is waited for are ignored.
An instance receives a PDU when the PDU meeting the conditions in Receive Block Top Filter and Instance Key) arrives. When it happens, data are extracted from the incoming packet, saved into variables, and the instance proceeds to execute one of the children blocks.
Multiple types of PDUs at different stack layers could be waited for and processed by a single Receive Block.
For example:
A Receive Block waiting for an incoming SIP INVITE PDU. Another Receive Block waiting for a ICMP PDU. A single Receive Block can combine the functionality of the two previous blocks.
Here is how it happens step-by-step:
- An incoming packet is presented to each instance waiting for a it contains (blocked in Receive).
- The packet is “reviewed” by each of the instances. Each instance makes an independent decision whether to receive it or not. The same PDU could be received by all the waiting instances, some of them, or none at all.
- If the arriving packet does not meet Top Filter (Pane 1) of the instance, the processing of the packet stops. The candidate packet is then checked against Instance Key filter (Pane 3). All the conditions listed in Instance Key pane have to be met for the packet to be accepted by the instance. If Instance Key is empty, the PDU is received by the instance.
Please note that Instance Key selection is dynamic – it uses current values of variables. The values can be changed during the execution. Hence, the same Receive Block may wait for different packets at different times.
NOTE:
While the same packet could be received by multiple instances, it is recommended to design a Flowchart so that each incoming packet is handled by no more than one instance. The easiest way to achieve this is to have a unique Instance Key filter for each concurrently running Receive Block.
Multiple Receive Blocks could be connected in parallel, waiting for different PDU. It is advisable to have at least one global Timeout Block connected in parallel to Receive Blocks in order to prevent the instance blocking indefinitely.
Properties
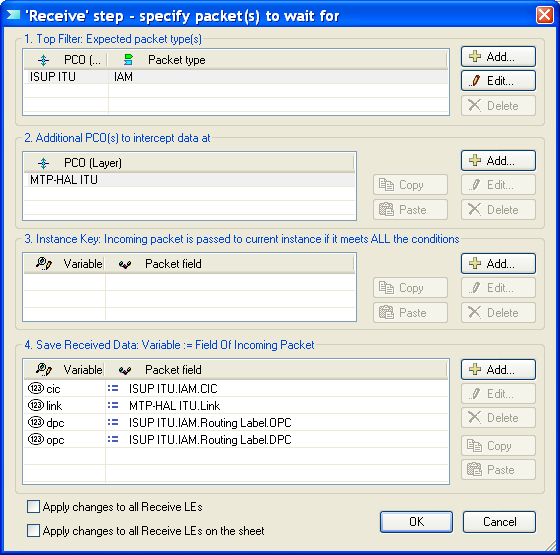
The types of PDUs to wait for, additional conditions the packets should meet, data layers to extract, data saving ops are all specified in the Receive Block properties dialog. The dialog contains four numbered panes:
- Top Filter (Pane 1)
- Additional Capture (Pane 2)
- Instance Key (Pane 3)
- Save Received Data (Pane 4)
Top Filter
Top Filter pane specifies type(s) of incoming PDU, regardless of the physical interface and underlying transport stack. For example, a Receive Block can wait for a number of different SS7 messages from all the active Sigtran links. The entry into the list defines a type of expected PDU. For multiple entries ‘OR’ logic is applied. To continue the multi-signaling link example, the same Receive Block can wait for SIP and ICMP messages in the same time. Each instance has an additional criteria defined by Instance Key pane (described below) to be matched in order for a PDU to be received by it.
Additional Capture
Additional Capture pane specifies additional PDUs to be captured during packet reception. These PDUs data is required for further analysis and processing. For example, a user may want to have access to some fields of UDP layer for a SIP packet carrying a specific SIP PDU “waited for” by Top Filter.
Instance Key
Instance Key is a list of conditions, one condition per line, specifying whether an incoming packet which passed through Top Filter (“Pane 1”) is received by an instance.
One can think of Instance Key as an input filter for an instance.
The conditions are in the form of A = B, where A is a global or local (“instance scope”) variable, and B is a field of the packet received. If the list is empty, all candidates are passed to the instance. For multiple list entries (conditions) ‘AND’ logic is applied – all the conditions must be true for the packet to be passed to the instance.
Variables values at the start of a new instance
During the execution of a Receive Block child of NULL State Block, the local (per instance) variables are at their initial values statically assigned by the Flowchart. This is important to keep in mind when using local variables in Instance Key.
Save Received Data
Allows saving received (passed through Top Filter and Instance Key) packets’ fields into variables. Any field of the PDUs captured by Top Filter and Additional Capture (“Pane 2”) can be saved for further use.
Routing Steps
From user point of view the incoming packets’ routing algorithm goes through four steps:
Step 1
An incoming packet is first presented to every instance waiting, except NULL Instance. Each of the instance has the packet to pass through the instance Top Filter (Pane 1) and Instance Key (Pane 3). For the details about these filters and their interaction see above.
Each instance analysis is independent, therefore the same packet could be received by multiple instances. If at least one of the instances receives the packet, the algorithm stops.
Step 2
The packet is presented to NULL Instance. If the packet passed through Top Filter (Pane 1) of the Receive Block directly descending from NULL State Block, and matches the associated Instance Key (Pane 3), NULL Instance spawns a new instance and pass the packet to it. The values of the local variables updated in Instance Key in this case are the initial values of the variables. If Instance Key is empty the decision whether to receive the packet is made based on Top Filter (Pane 1) only. If NULL Instance starts the new instance as described above, the algorithm stops.
Step 3
The packet is dropped and the algorithm stops. Some of the dropped packets can generate “Unexpected packet…” warning line in Execution Log. The decision whether to print this warning or not is taken by an internal algorithm.
Can a packet be received by > 1 instance?
Yes, but users are discouraged from using this capability, as it goes against the idea of Instance Key filter.
The same packet may be received by multiple instances. It could lead to confusion as it produces more blue “Receive” trace lines in Execution Log than the actual number of incoming packets received. It can be avoided by making sure that in all times each instance has a unique Instance Key filter in its waiting Receive Block.
Timeout
Receive Block has no timeout property.
In cases where a Receive Block is directly descending from a NULL State Block, usually no timeout is required. The Block are there to support functionality of server side blocked wait. It does not block execution of non-NULL instances.
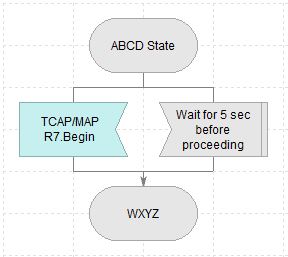
When a Receive Block is not directly descending from a NULL State Block, it is often desirable to limit the wait time. If nothing is received within the time period specified, the Block is skipped and the instance continues execution. In those cases one could use a Trigger Block.
When not directly descending from a NULL State Block, the Trigger Block delays the instance execution for a set period of time. Therefore “Receive with timeout” logic can be implemented by adding a Trigger Block in parallel with Receive Block.
Send Block
A Send Block sends an outgoing PDU to a transport stack.
Properties
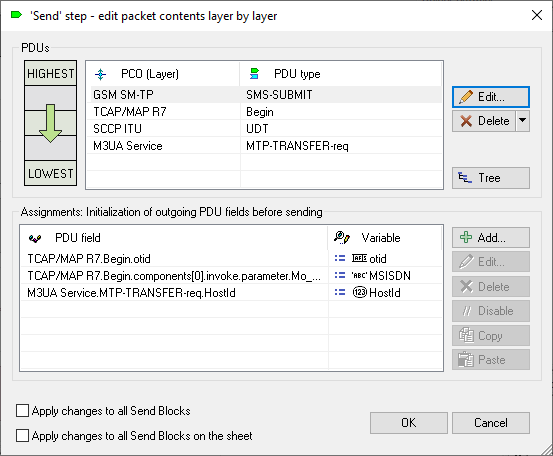
A Send Block allows to:
- Select the simulated protocol layers
- Select the interface to the transport layers
- Statically edit the outgoing PDU via Packet Wizard
- Dynamically modify fields of outgoing packets from variables
An IP packet captured in Pcap or Hex format can be converted into Send Block with a few point-and-clicks. Groups of packets can be imported in a single operation. The imported packets can be edited with Packet Wizard.
PDU Layers Pane
This pane allow to build top down stack of the simulated PDU layers and the interface layer to the transport stack.
This pane has two modes:
- Linear (Tree View button is unpressed)
- Tree (Tree View button is pressed)
Linear Mode is the default. In this mode one can build multi-layer PDU stack top to bottom. The top layer is selected from the list of supported layers. For the lower layers, the choice is limited to the layers capable of carrying the upper layer as a payload. Linear editing does not allow more than one type of payload (upper layer) for one carrier (underlying lower layer). One cannot build a tree like structure of protocol layers in this mode.
Tree Mode allows building multi-layer PDU from the bottom up. One starts with the lowest layer. Then one can add upper layers on top using Add button. If permitted by the specs one can add more than one type of upper layer PDU on top of a lower one and thus build a tree-like PDU structure
Click Edit for editing a PDU with Packet Wizard.
Dynamic Mods
During Flowchart execution an outgoing PDU can be modified dynamically before been passed to an underlying transport stack. The PDU fields can be assigned values from local or global variables. The assignments are added to the bottom pane of Send Block properties dialog.
Group Modify
Apply changes check boxes at the bottom left of Send Block properties dialog allow to edit a group of Send Blocks by editing just one of them. Depending on the check box selected a change made in a current Block will be replicated in all Send Blocks located either on the same sheet, or in all Send Blocks present in the Flowchart.
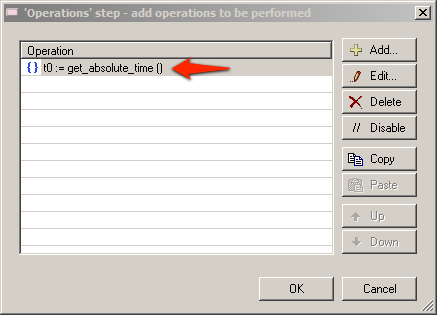
Operations Block
An Operations Block contains a list of operations—Action List—to be performed when instance control flow reaches the Block. The list, one entry per line, is defined via the Block properties dialog. Actions in the list are performed sequentially, top down.
Actions
When Operations Block is executed, Actions alter values of local and global variables and perform a variety of other tasks. Examples of Actions: a PDU field value is changed, a calculation performed, an external Python script called, etc.
Actions can be of two kinds: statements and commands. Statements change values of variables and have a form of variable := expression. Commands are: Print and Stop, Execute Python, etc. When an Operations Block is executed, the Actions are executed one-by-one, top down.
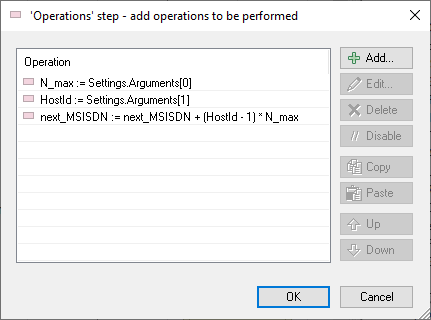
Adding to Action List
A new Operations Block has its Action List empty. It could be left empty, or filled manually per requirements of the task. To add action to Action List click Add button.
Supported actions types. X is always a variable:
- X := Y — Assign Y to X. Y is an expression built with Formula Wizard.
- X := X + Y — Increment X by Y. Y is an expression built with Formula Wizard.
- X := X - Y — Decrement X by Y. Y is an expression built with Formula Wizard.
- Print [Args]
- Execute Procedure
- Execute Python script: Script [Args]. Optionally store result to X.
- Make API Call: API Call [Args]. Optionally store result to X.
- Stop. Stop execution. Triggering Soft Stop Procedure, if configured.
Making API Call
To add an API call to Action List, click Add button.
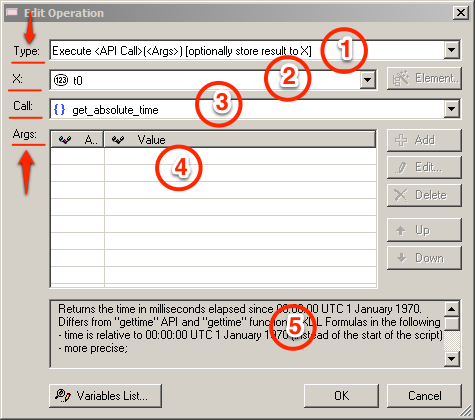
- Select Execute
[Args] . Optionally store result to X. - Select from the list of variables.
- Select from drop-down list of API functions supported.
- Fill in the selected API function arguments, if any.
- Brief description of the API function.
A statement making the API call is added to Action List.
Decision Block
A Decision block has an ingress and two egress points. Depending on the associated condition Decision Block directs execution of the instance to one of the two possible execution paths.
Properties
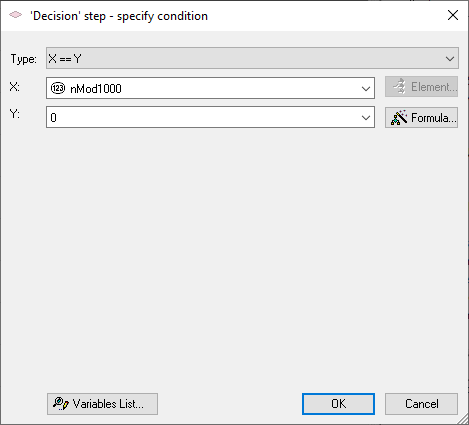
X – A variable, including predefined environment variables
Y – Arbitrary expression, possibly including variables
Type condition selection:
| Condition | Types of Arguments |
|---|---|
| X == Y | All |
| X <> Y | All |
| X > Y | INT |
| X >= Y | INT |
| X < Y | INT |
| X <= Y | INT |
| Logical expression built with Formula Wizard |
To open Formula Wizard, click Formula button.
Timer Blocks
| Start Timer | Stop Timer | Timeout |
|---|---|---|
|
|
|
The Timeout Block directly descending from a NULL State Block plays a special role — it dynamically creates new Instances during Flowchart execution. Otherwise it operates as a timer controlled gate.
Timers List
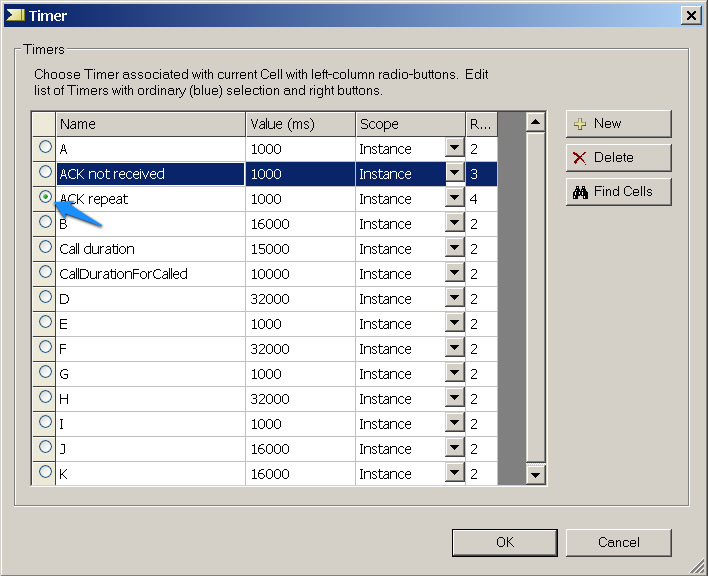
The dialog allows adding, deleting or modifying timers. The radio button in the leftmost column points to the timer associated with the current timer block. Column Refs contains the number of references to the timer in the Flowchart.
Start/Stop Timer
When an instance executes a Start Timer Block, it starts a millisecond countdown timer from a set value. The timer runs on background until the counter gets to 0. The timer could be reset or stopped before it reaches 0. If the instance executes a Start Timer Block for the timer already running, the timer counter is reset to its initial value and the countdown starts anew. If before the countdown reaches 0, the Flowchart executes Stop Timer Block for the timer, the timer becomes inactive.
Timers scope could be:
- Local – Visible only in the context of the instance which have started it. No other instance could stop the timer or handle its expiry.
- Global – Visible by all instances. Any instance could stop the timer or handle its expiry.
Timeout
Timeout Block egress is closed by default. An instance arriving to an ingress point of a “closed” Timeout Block, just sits there waiting for the egress to open. Multiple Timeout Blocks for the same timer could be present in a Flowchart.
If an instance arrives to an ingress point of an “opened” Timeout Block, it passed through without delay. Timeout Block resets into the initial, closed state. The timer resets to its initial value and becomes inactive.
Timeout Block directly descending from a NULL State Block can be only of a global type. Local timers can not be used in this case.
Synchronization
Global timers can be used for inter-instance synchronization. For one instance to send a signal to another, the originating instance should start a global timer with 0 counter. The “receiving” test instance should check for the timer expiration with Timeout Block.
Reference Block
| From | To |
|---|---|
 |
 |
A Reference block is used to connect two Blocks on a Flowchart difficult or impossible to connect otherwise. One example is the connection between Blocks on different worksheet pages.
Reference Blocks with the same name represent the same logical point in the Flowchart.
instance passing through a Reference Block pair does not change its state in any way and has no side effects. The event is not displayed in the the Execution Log.
References Table
This table lists all references present in a Flowchart. Ref column has the number of blocks using the reference. Some entries may have zero Block referring to them. Such “zero reference” entities have reference count (Refs column) of 0 and are colored in red.
Presence of unexpected zero count references in the References table may be the result of Copy/Paste from another Flowchart.
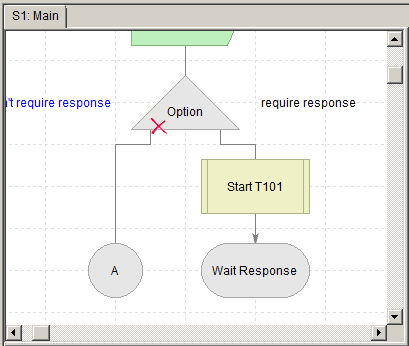
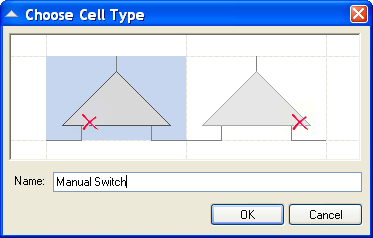
Option Block
An Option block operates similarly to a manually operated mechanical switch. It directs an instance execution to one of two possible paths. A user has to make the selection manually before the execution starts. For run time dynamic path switching, use Decision Block.
Properties
Procedure Blocks
| Enter Procedure | Exit Procedure |
|---|---|
|
|
A Procedure is a specially marked reusable fragment of a Flowchart performing a well defined task, similarly to a function or a procedure in any modern programming language. A Procedure has a unique name used to call it from elsewhere in the Flowchart. Start Procedure Block denotes the beginning, Stop Procedure Block denotes the end of a Procedure. A Procedure can be called by name from Operations Block Action List.
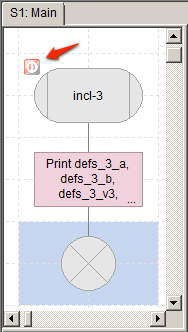
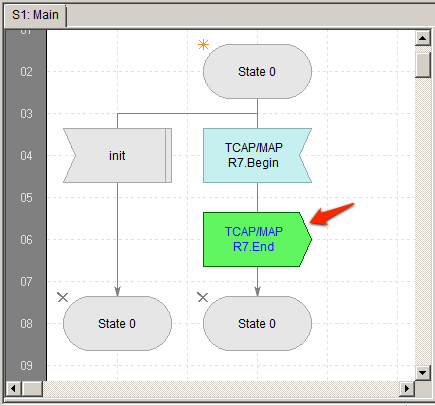
The red arrow above points to a special mark indicating Soft Stop Procedure.
Soft Stop Procedure
Soft Stop Procedure is a special type of Procedure used for end-of-the-run cleanup. While not required, every well-written Flowchart should have a Soft Stop Procedure, even if empty.
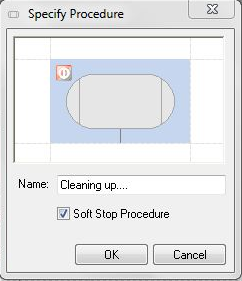
There is only one Soft Stop Procedure in a Flowchart. Selecting Soft Stop check box designated a current procedure as such. The procedure is not called by name, but instead activated by calling Stop in Operations Block, or clicking Stop button on the right side of Studio. Soft Stop Procedure is activated at the very last moment before Flowchart execution stops and should be used for tasks to be performed at the very end of the execution, such as final cleanup.
Procedures List
Procedures List can be viewed by executing Edit >> Procedures List command from the main menu. This read only list is built automatically and includes all the procedures in the Flowchart.
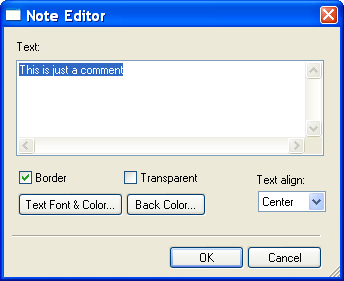
Comments Block
A Comments Block allows placing text comments into Flowchart and has no other functionality.
Properties
The Properties dialog allows to configure the message fonts, colors, positioning, etc.